



Siding installation can change a home’s appearance while protecting the structure from rain, wind, sun, and seasonal temperature changes. For U.S. homeowners, the main decisions involve material, budget, wall condition, labor, and the details used around windows, doors, and corners. Knowing what happens before the first panel goes up can make contractor estimates easier to compare and costly surprises easier to avoid.
| Project detail | Practical planning point |
|---|---|
| Typical 2026 project cost | About $5,561–$17,724 for many U.S. projects |
| Reported national average | About $11,590 |
| Typical installation time | Roughly one to two weeks for many homes |
| Common materials | Vinyl, fiber cement, engineered wood, wood, and metal |
| Major cost drivers | Wall area, home height, material, tear-off, repairs, and trim |
| Key protection details | Weather barrier, flashing, drainage, correct fastening, and sealing |
| Best first step | Inspect the exterior and compare detailed written estimates |
For many U.S. homes, siding installation takes about one to two weeks once construction begins. Costs vary widely, but current national data places many projects between roughly $5,500 and $17,700. Material choice, wall area, old-cladding removal, hidden repairs, trim work, and local labor rates can move the final price higher or lower.
Key Takeaways
- Get written estimates that separate materials, labor, removal, repairs, trim, permits, and disposal.
- Compare exterior materials by climate performance and upkeep, not price alone.
- Expect the crew to inspect and prepare the wall before installing the finished exterior.
- Plan for possible repairs after removing the old material.
- Follow manufacturer requirements for flashing, fastening, spacing, and weather protection.
- Consider professional installation when the project involves multiple stories or significant wall repairs.
How Much Does Siding Installation Cost in 2026?
Current Angi data puts the average U.S. replacement project near $11,590, with many jobs falling between $5,561 and $17,724. Those figures provide a national planning range rather than a price for a specific property. Your quote can differ because contractors price the actual wall area, material, access, preparation, and local labor conditions.
A simple one-story house with easy access generally requires less labor than a tall home with dormers, gables, bay windows, and numerous corners. Removing old material can increase labor and disposal costs, while damaged sheathing or framing can create work that could not be priced before demolition. Permit requirements also vary by city and county, so homeowners should ask whether the estimate includes fees and inspections.
The lowest bid is not automatically the lowest long-term cost. A proposal should explain which weather barrier, flashing, trim, fasteners, caulk, disposal services, and repairs are included. Comparing the same scope across several estimates gives you a much clearer view of value.
Typical Installed Prices by Material
| Material | Approximate installed range | Common reason homeowners choose it | Main consideration |
|---|---|---|---|
| Vinyl siding | $3–$12 per sq. ft. | Lower cost and limited maintenance | Needs correct spacing for movement |
| Fiber cement siding | $5–$14 per sq. ft. | Durable appearance and weather resistance | Heavier and more labor intensive |
| Engineered wood | $3–$12 per sq. ft. | Wood-like appearance with engineered performance | Finish and moisture details matter |
| Aluminum | $2–$5 per sq. ft. | Low maintenance and corrosion resistance | Can dent from impact |
| Natural wood | Varies widely by species and finish | Traditional appearance | Requires more ongoing maintenance |
These ranges help compare materials, but the square-foot figure never tells the whole story. Corners, trim, soffits, fascia, window details, removal, waste, scaffolding, and repairs can all affect the final amount. Ask contractors to include allowances for hidden damage so you understand how they’ll handle change orders.
What Happens During a Professional Installation?
A good exterior project starts with inspection rather than immediate covering. The crew needs to understand the condition of the existing surface and the wall behind it before attaching the finished material. This is also when you should discuss obvious moisture damage, loose sections, failing trim, and access issues.
A typical project follows this sequence:
- Site preparation: The crew protects landscaping, moves vulnerable items, and establishes safe work and material-storage areas.
- Removal: The crew removes existing exterior material as required by the project design and wall condition.
- Wall inspection: The crew checks exposed sheathing and surrounding components for rot, moisture damage, or other defects.
- Repairs and weather protection: Correct damaged areas, then install required weather-resistant barriers and flashing details.
- Trim and starter components: Install corners, channels, starter pieces, and other system-specific parts.
- Exterior material installation: Install courses or panels according to the manufacturer’s fastening and spacing instructions.
- Detail work and cleanup: Address openings, penetrations, transitions, trim, sealant locations, debris, and remaining punch-list items.
Moisture management deserves particular attention because the finished exterior is only one part of the wall system. Flashing and weather-resistant barriers need to direct water outward instead of trapping it behind the finish. Homeowners planning broader exterior improvements may also find Housnyst’s guide to roof and attic heat management useful when thinking about the house as a complete weather and energy-control system.
How Long Should the Project Take?
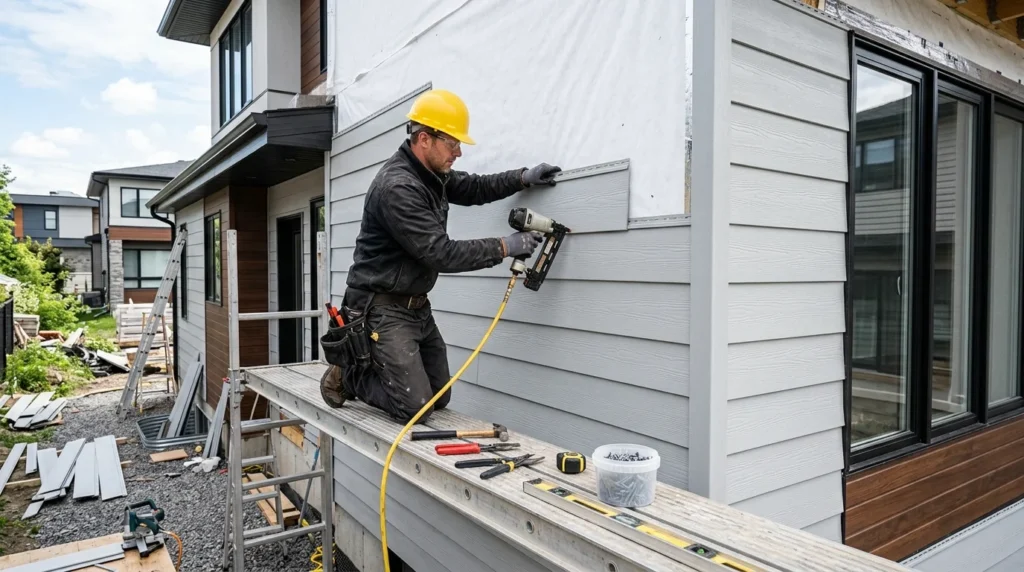
Angi’s 2026 guidance places many installations in the one-to-two-week range, while the exact schedule depends on the building and scope. A smaller, straightforward house may move faster, while a larger two-story property can take longer. Weather, material handling, demolition, repairs, and complex architectural details can also extend the schedule.
The construction period is not the same as the full project timeline. Product selection, measurements, material ordering, permit review, crew scheduling, and inspections may happen before or after active construction. Ask the contractor for both an estimated start date and an expected number of working days.
Homeowners can reduce avoidable delays by making product decisions early and clearing access around the building before work begins. Move pets, vehicles, outdoor furniture, grills, planters, and fragile decorations away from work areas. Good preparation gives the crew safer access and reduces the chance that everyday household items interrupt progress.
Choosing the Right Exterior Material
Material choice should reflect climate, maintenance preferences, appearance, and budget. Vinyl is widely used because it can offer a lower entry price and relatively simple upkeep, while fiber cement appeals to homeowners who want a substantial painted finish. Wood and engineered products can provide distinct architectural looks, but their maintenance and moisture requirements differ.
Climate should influence the decision, not be an afterthought. Strong sun, wind-driven rain, freeze-thaw cycles, coastal exposure, and wildfire concerns can make certain products or installation details more suitable than others. Housnyst’s look at exterior materials used in climate-conscious home design offers another example of why material selection should respond to local conditions.
Finish maintenance matters too, particularly for painted products and surrounding wood trim. Coatings last longer when the underlying surface is sound, dry, clean, and properly prepared. Housnyst’s guide to preventing exterior paint failure explains the same preparation principle.
Should You Install It Yourself or Hire a Contractor?
Experienced DIYers may be able to complete limited work on a simple, accessible wall, especially when the manufacturer provides clear instructions. Whole-house projects are less forgiving because small errors in flashing, alignment, fastening, or water management can be repeated across hundreds of square feet. Multi-story access also adds fall hazards and makes material handling harder.
Professional installation becomes more valuable when you must remove old material or when the wall may need repair. A contractor can also coordinate trim details, openings, transitions, waste removal, and local permit requirements in one scope. Before hiring anyone, verify licensing where required, insurance, written warranty terms, references, and experience with the exact product you selected.
The installation contract should describe preparation as clearly as the visible finish. This same principle applies to other exterior openings, where hidden water-control details often matter more than the part homeowners see from the street. Housnyst’s discussion of why DIY exterior-door installation can create expensive problems explains why careful flashing and sealing deserve attention.
How to Compare Contractor Estimates
Start by requesting detailed written proposals from several qualified contractors instead of comparing one total price against another. Each estimate should identify the material, product line, quantity, removal work, wall preparation, trim, flashing, disposal, labor, warranties, and exclusions. If one company includes repairs and another lists them separately, the headline prices are not directly comparable.
Ask what happens when the crew discovers damaged sheathing or framing after removal. The contractor should explain the approval process, labor rate, material markup, and documentation used for additional work. Clear change-order rules protect both parties and make budgeting easier.
Warranty questions matter as well because product and labor warranties are not necessarily the same. Ask who handles a future problem, what workmanship coverage includes, and whether manufacturer registration is required. Keep the signed contract, product information, color details, invoices, and warranty documents after the project is finished.
How to Prepare Your Home Before Work Begins
A few practical tasks can make the first day of construction easier. Walk around the property with the contractor before work starts and identify landscaping, exterior outlets, cameras, lights, gates, air-conditioning equipment, and other items requiring protection. Also ask where the dumpster, materials, ladders, and work vehicles will be placed.
Before the crew arrives:
- Move patio furniture, grills, toys, planters, and decorations away from exterior walls.
- Trim plants that block safe access where appropriate.
- Park vehicles away from areas where debris or materials may fall.
- Remove fragile wall decorations in rooms near active work.
- Keep children and pets away from construction areas.
- Confirm how they will collect nails, scraps, packaging, and old materials.
- Ask how they will protect the home if rain arrives during the project.
Check the exterior again with the project manager before final payment. Look at trim alignment, transitions, penetrations, cleanup, and any items listed during the earlier walkthrough. Addressing questions while the crew is still on site is easier than trying to reconstruct the issue later.
Frequently Asked Questions
How long does siding installation take?
Many whole-house projects take roughly one to two weeks of active construction, according to current 2026 industry estimates. Simple one-story homes may finish sooner, while larger properties, difficult access, weather delays, or hidden repairs can add time. Your contractor should provide an estimated number of working days based on the measured scope.
Can new siding go over old material?
Sometimes you can install new material over an existing exterior, but the wall must be suitable for that approach. Covering damaged, uneven, or moisture-affected material can hide problems instead of correcting them. The manufacturer, contractor, wall condition, and local code requirements should guide the decision.
Do I need a permit for a replacement project?
Permit requirements differ across U.S. cities, counties, and states. Some jurisdictions may treat a straightforward replacement differently from work that changes structural components or wall assemblies. Ask the contractor and local building department what applies to your address before construction begins.
What is the best time of year to replace exterior cladding?
The right season depends on local weather, contractor availability, and the product being installed. Crews generally need conditions that allow safe access and proper use of barriers, sealants, coatings, and other weather-sensitive components. Scheduling outside a contractor’s busiest period may also provide more flexibility, but suitable installation conditions remain the priority.
How do I know whether the wall needs repair first?
Loose panels, soft wood, staining, persistent moisture, deteriorated trim, or visible damage can signal that you need further investigation. The most reliable inspection often happens after the contractor removes deteriorated exterior material and exposes the sheathing. Your contract should explain how the contractor will document and price repairs discovered at that stage.
Plan the Project Around the Wall, Not Only the Finish
A successful exterior replacement is more than choosing a color and attaching new panels. Wall condition, drainage details, flashing, preparation, fastening, and workmanship all affect how well the finished system performs. Spend time comparing the scope behind each estimate before comparing the final numbers.
Start by inspecting the exterior, choosing materials that fit your climate and maintenance preferences, and collecting detailed written proposals from qualified installers. Ask each contractor how they’ll handle removal, hidden repairs, weather protection, cleanup, and warranty service. Those answers can help you choose a project plan that protects both your budget and your home.