

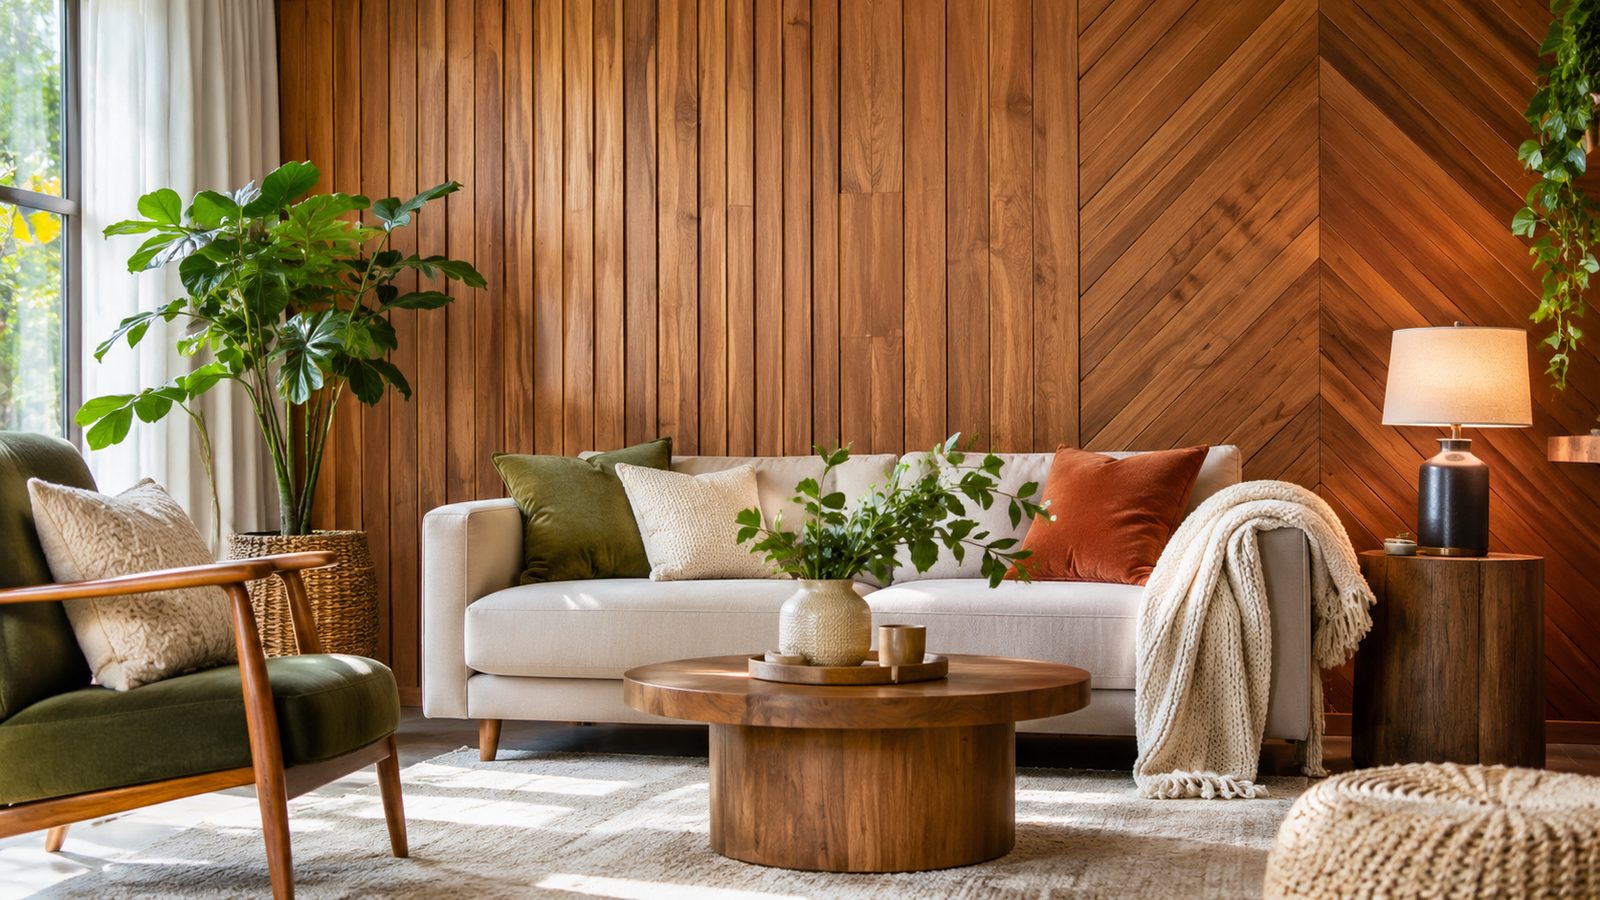
Wood panel walls can make an ordinary room feel warmer, more detailed, and more welcoming. From classic shiplap to modern acoustic slats, the right design adds texture without overwhelming your existing decor. Whether you’re planning a DIY accent wall or updating dated paneling, choosing suitable materials and finishes makes all the difference. A wood panel wall can work in living rooms, bedrooms, hallways, dining areas, and selected bathroom spaces. Your choice should reflect the room’s moisture levels, existing architecture, maintenance needs, and decorating style. This guide explains popular designs, material options, installation steps, and practical safety considerations for American homeowners.
Wood Panel Walls: Quick Guide
| Feature | What to know |
|---|---|
| Popular styles | Shiplap, tongue-and-groove, board and batten, beadboard, slats, reclaimed wood, and veneer |
| Common materials | Solid wood, MDF, plywood, wood veneer, and peel-and-stick products |
| Best applications | Accent walls, headboards, ceilings, wainscoting, and feature areas |
| Bathroom suitability | Choose products specifically approved for the moisture conditions |
| Installation methods | Construction adhesive, brad nails, screws, or manufacturer-approved mounting systems |
| Common finishes | Natural wood, stained, painted, whitewashed, and textured finishes |
| Main considerations | Moisture, expansion, electrical boxes, fastening, and fire ratings |
Quick answer: Wood panel walls use decorative boards or manufactured panels to add texture, warmth, and architectural detail. Popular options include shiplap, beadboard, board and batten, and vertical slats. Choose materials according to room conditions, prepare the surface, locate studs, and secure panels correctly.
1. Popular Wood Panel Wall Styles
Different panel profiles create different visual effects. Understanding their construction helps you choose a design that suits your home’s architecture.
Shiplap
Shiplap features horizontal or vertical boards with overlapping rabbeted edges. Its characteristic shadow lines create a relaxed appearance associated with farmhouse, coastal, and contemporary interiors. You can leave the boards natural or paint them white, cream, sage, or charcoal.
Tongue-and-Groove
Tongue-and-groove boards have a projecting edge that fits into a neighboring groove. This interlocking connection produces a neat surface with consistent joints. It’s suitable for cottage interiors, traditional rooms, ceilings, and full-height feature walls.
Board and Batten
Board and batten combines wider boards or flat wall sections with narrow vertical strips covering their joints. The resulting pattern creates structured rectangular sections and strong vertical lines. It works particularly well in entryways, dining rooms, bedrooms, and transitional interiors.
Wainscoting and Beadboard
Wainscoting describes decorative paneling installed along the lower portion of a wall. It can include flat panels, raised panels, or beadboard detailing. Beadboard uses narrow vertical grooves that create a traditional cottage appearance. These styles suit hallways, dining rooms, bathrooms, and staircases when the material is appropriate. A contrasting upper wall color can make the lower panels stand out. Adding a finished cap rail creates a clean transition between the paneling and painted wall.
Slat and Acoustic Wood Panels
Slat panels use evenly spaced narrow wooden strips to create a modern architectural feature. They often have a dark backing that emphasizes the spaces between individual slats. Vertical arrangements can draw attention toward the ceiling, while horizontal patterns create a wider visual effect. Some decorative versions include felt backing designed to absorb sound reflections. Their acoustic performance depends on the panel construction, backing, installation, and tested specifications. Decorative slat panels should not automatically be treated as soundproofing systems.
Reclaimed Wood
Reclaimed wood panels bring natural variation, weathered finishes, and visible grain into interior spaces. They can include salvaged barn boards, old timber, and previously used wooden planks. Each board may have different colors, knots, nail holes, and surface textures. Inspect reclaimed material for pests, damage, contamination, and old coatings before installation. Older painted wood may contain lead-based paint, particularly in homes built before 1978. Follow appropriate testing and renovation guidance before disturbing questionable finishes.
1970s-Style Veneer Paneling
Traditional 1970s paneling often features large sheets with dark brown colors, prominent grain patterns, and glossy finishes. These surfaces can make a room feel dated when combined with heavy furniture and limited lighting. Fortunately, you don’t always need to remove the existing panels. You can update the appearance with paint, lighter trim, modern furniture, and improved lighting. Another option is to replace selected sections with contemporary slats or contrasting decorative panels. Keeping some original wood visible can preserve character while making the room feel more current.
2. Wood Paneling Materials: Which Should You Choose?
The material affects appearance, durability, moisture resistance, finishing requirements, and installation difficulty. Compare the available options before purchasing panels.
| Material | Main advantages | Limitations |
|---|---|---|
| Solid wood | Authentic grain, natural character, repairability | Expands and contracts with humidity |
| MDF | Smooth surface, consistent profiles, easy painting | Standard MDF swells when wet |
| Plywood | Lightweight sheets, structural stability, versatile finishes | Exposed edges may require finishing |
| Wood veneer | Natural wood appearance over an engineered core | Thin surface can be damaged during sanding |
| Peel-and-stick | Lightweight, simple installation, minimal tools | Adhesion depends on surface and product suitability |
Solid Wood
Solid wood provides natural grain patterns and an authentic timber appearance. Pine, oak, cedar, and poplar are common choices for interior applications. Allow the boards to acclimate before installation because wood responds to changes in humidity.
Medium-Density Fiberboard (MDF)
MDF offers a smooth, consistent surface that accepts paint well. Manufacturers produce it in different profiles, including beadboard and decorative grooves. Standard MDF is unsuitable for wet areas because moisture can cause swelling and deterioration. Moisture-resistant MDF is available for selected humid interior applications. It still isn’t waterproof, so follow the product’s approved locations and finishing instructions. Avoid using it in showers or places with constant direct water exposure.
Plywood
Plywood consists of bonded wood layers that provide dimensional stability. It works well for sheet paneling, decorative wall sections, and custom-cut slat designs. Check the grade, thickness, exposed edges, and finish requirements before installation.
Wood Veneer
Wood veneer uses a thin layer of real wood attached to an engineered backing. It offers the appearance of natural timber while reducing the amount of solid hardwood required. Avoid aggressive sanding because the decorative surface can be quite thin.
Peel-and-Stick Panels
Peel-and-stick products provide an accessible option for lightweight decorative updates. They typically require a clean, smooth, dry surface for reliable adhesion. Check whether the manufacturer approves the product for your wall type, temperature, and moisture conditions.
3. Choosing Panels for Different Rooms
The right paneling depends on how each room is used. Moisture, cleaning requirements, furniture placement, and natural light should guide your decision.
Living Rooms
Living rooms are excellent locations for decorative feature walls. Consider natural oak slats, painted shiplap, or reclaimed timber behind the main seating area. Coordinate the finish with flooring, furniture, and existing architectural details. For layout inspiration, explore Housnyst’s guide to planning comfortable room layouts. Keep heating and cooling vents accessible when positioning furniture and decorative elements. This helps maintain a comfortable, functional room.
Bedrooms
A paneled headboard wall creates a focal point without requiring extensive decoration. Vertical slats, warm-toned veneer, and painted board and batten are attractive options. Choose finishes that complement bedding, bedside furniture, and lighting. You can also coordinate the panels with floating shelves or decorative storage. See Housnyst’s bedroom shelf design ideas for ways to organize and decorate the space. Keep heavy objects securely mounted and avoid unsafe arrangements above sleeping areas.
Bathrooms
Bathrooms require careful material selection because humidity and splashing can damage unsuitable products. Choose moisture-rated panels specifically approved for the intended application. Proper sealing, ventilation, and installation are essential for protecting surrounding surfaces. Do not install standard MDF in wet areas. Moisture-resistant MDF may suit selected bathroom walls outside direct water-contact zones, subject to manufacturer instructions. Use purpose-built waterproof systems for showers and other continuously wet locations.
Kitchens and Dining Rooms
Painted beadboard and wainscoting can add character to dining spaces and breakfast areas. In kitchens, decorative panels can work on suitable walls away from direct water and heat exposure. Avoid placing ordinary wood products behind stoves or using them as unapproved backsplash surfaces. Consider how lighting affects the panel color and grain. Housnyst’s under-cabinet lighting guide offers ideas for improving kitchen illumination. Keep fixtures and electrical installations suitable for their surroundings.
4. Creative Design Ideas for Wood Panel Walls
Paneling can cover an entire room or highlight one carefully selected surface. The best approach depends on the room’s proportions and existing decorative features.
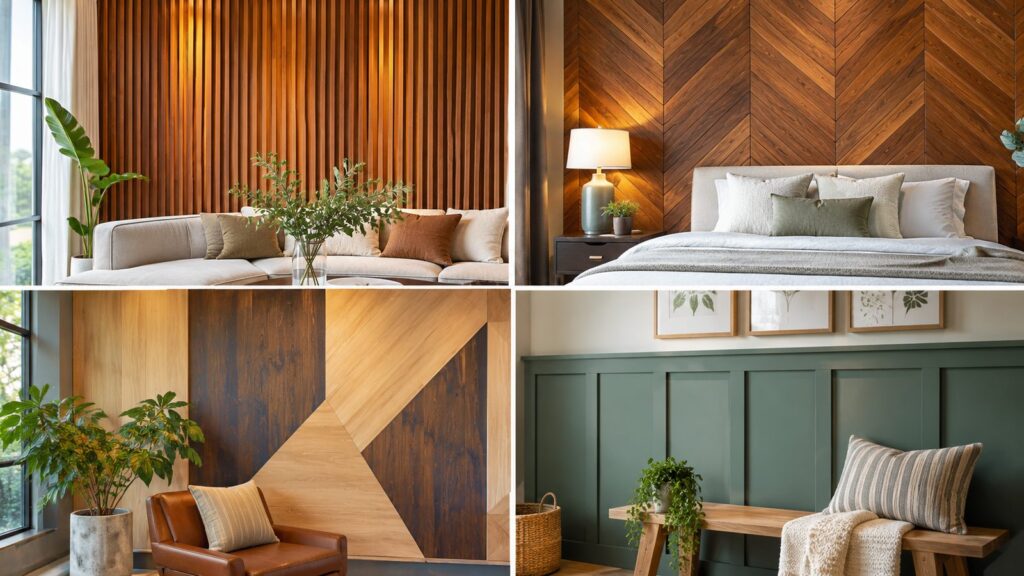
Create an Accent Wall
Choose the wall that naturally attracts attention when someone enters the room. A living room television wall or bedroom wall behind the bed often works well. Use contrasting wood tones or panel directions to create a clear focal point.
Extend Panels Across the Ceiling
Ceiling paneling creates continuity between walls and overhead surfaces. Tongue-and-groove boards and narrow wood slats are suitable design options. Check ceiling framing, fastening requirements, fixture clearances, and product weight before installation.
Build a Headboard Feature
A wood-paneled section behind a bed can replace a conventional headboard visually. Extend the panels slightly beyond the bed width for a balanced arrangement. Add matching bedside furniture and appropriately positioned wall lighting.
Choose Painted or Natural Finishes
Painted panels suit interiors that need a lighter, more uniform appearance. White, warm gray, muted green, and navy can complement different decorating styles. Natural finishes showcase grain patterns and bring warmth into neutral rooms. Stained finishes allow you to adjust the wood’s appearance without completely hiding its texture. Matte and satin finishes offer different levels of sheen. Always test the selected finish on a sample before treating the entire installation.
5. DIY Wood Panel Wall Installation
Installing decorative panels can be a manageable home improvement project with careful planning. The correct fastening method depends on panel weight, wall construction, and manufacturer requirements.
Tools and Materials
Prepare the following items before beginning.
- Measuring tape and pencil
- Stud finder
- Level or laser level
- Circular saw or appropriate cutting tool
- Brad nailer and suitable brad nails
- Construction adhesive approved for the materials
- Sandpaper and wood filler
- Caulk and finishing supplies
- Safety glasses, hearing protection, and suitable dust protection
- Non-contact voltage tester for electrical safety checks
Step 1: Measure and Plan the Wall
Measure the wall’s height and width at several points. Calculate its area and determine how panels will fit around corners, doors, and windows. Plan the layout to avoid narrow or awkward pieces at visible edges.
Step 2: Acclimate the Boards
Bring the panels into the installation room before fitting them. Follow the manufacturer’s recommended acclimation period and storage conditions. This helps reduce problems caused by changes in temperature and humidity.
Step 3: Locate Studs and Check the Wall
Use a stud finder to identify framing locations and mark them clearly. Check for concealed electrical wiring, plumbing, and other obstacles before cutting or drilling. Repair significant wall damage and confirm that the surface is suitable for installation.
Step 4: Establish a Level Starting Line
Floors and ceilings aren’t always perfectly level. Use a level or laser to establish a reliable reference line before positioning the first board. Check alignment carefully because small mistakes can become more visible across the wall.
Step 5: Apply Adhesive and Brad Nails
Apply construction adhesive according to the manufacturer’s instructions. Position the first panel against your reference line and fasten it using suitable brad nails into the studs. Follow the product’s fastening schedule and use additional mechanical fasteners where required.
Step 6: Continue Across the Wall
Fit the remaining boards using the appropriate joint or spacing system. Check alignment after installing each section. Make accurate cuts around corners, windows, and door openings without forcing panels into place.
Step 7: Allow for Expansion
Wood naturally expands and contracts as moisture conditions change. Follow the panel manufacturer’s specified expansion clearances at edges, ceilings, floors, and adjoining surfaces. Cover suitable perimeter gaps with trim or other approved finishing details.
Step 8: Cut Around Electrical Outlets Safely
Electrical safety requires particular attention during panel installation. Turn off the relevant circuit breaker before working near an outlet. Confirm the circuit is dead using a non-contact voltage tester, following the tester’s instructions. Measure and cut the panel opening carefully without damaging wiring or the electrical box. When the added panel thickness makes an existing box recessed, use a listed box extender or approved extension ring. The applicable NEC requirements call for the box or listed extension to reach the finished surface in wood or other combustible surfaces. This is addressed under NEC Section 314.20, subject to the locally adopted edition and applicable installation details. Follow local electrical code and manufacturer instructions. Contact a licensed electrician if you cannot safely complete the work or determine the correct extension.
Step 9: Fill, Caulk, and Finish
Fill suitable nail holes with compatible wood filler and sand the repaired areas smooth. Apply paintable caulk at appropriate trim joints, not where movement gaps must remain open. Finish the panels with the selected paint, stain, or protective coating.
6. How to Paint Over Old Wood Paneling
Painting can refresh dated wall treatments without removing every existing board. First, determine whether the original panels are solid wood, veneer, or a coated manufactured product. The preparation method should suit the existing surface. Follow these steps:
- Clean the panels to remove grease, dust, and residue.
- Lightly degloss the surface using suitable sandpaper or a recommended deglossing product.
- Fill unwanted dents, cracks, and damaged areas with compatible filler.
- Decide whether to keep the existing grooves or fill them for a flatter appearance.
- Apply an appropriate bonding primer for the existing finish and panel material.
- Paint using a compatible interior coating, following drying instructions.
- Apply additional coats when required for even coverage.
If you want a traditional paneled appearance, leave the grooves visible. For a more contemporary finish, fill them carefully and create a smoother surface. Use a suitable stain-blocking primer when discoloration or old coatings require it. Before sanding or disturbing older painted surfaces, consider the possibility of lead-based paint. Homes built before 1978 may contain lead paint, so follow EPA renovation guidance and use qualified professionals when required.
7. Fire Safety and Building Code Considerations
Decorative panels aren’t automatically approved for every wall or ceiling application. Some products have documented flame-spread and smoke-developed ratings from recognized testing methods. Requirements depend on the building type, room use, occupancy, and locally adopted codes. Ask manufacturers for product test documentation, including applicable ASTM E84 or UL 723 results. Check whether the specified product meets the requirements for your intended location. Certain rooms and building assemblies may require particular interior-finish classifications. Consult your local building department or qualified building professional before installation when requirements are unclear. Don’t assume that a decorative wood finish meets the same fire-performance requirements as the original wall assembly.
8. Frequently Asked Questions
What is the best wood panel wall style for a modern home?
Vertical slat panels, simple tongue-and-groove boards, and clean board-and-batten designs suit many modern interiors. Choose a profile that complements your furniture and architectural details. Natural oak tones and understated painted finishes are useful starting points.
Can you install wood paneling in a bathroom?
Yes, provided the selected product is approved for the bathroom’s specific moisture conditions. Use suitable moisture-resistant or waterproof materials and follow installation and sealing instructions. Standard MDF should not be installed in wet areas.
Is MDF or plywood better for wall paneling?
MDF offers a smooth surface that works well for painted decorative profiles. Plywood provides layered construction and can offer attractive wood finishes. Choose according to moisture exposure, appearance, panel thickness, and fastening requirements.
Can you install panels directly over drywall?
Many decorative panels can be installed over sound, clean, and properly prepared drywall. Use suitable adhesive and mechanical fasteners according to the panel manufacturer’s instructions. Locate studs whenever the installation requires structural fastening.
How do you update old 1970s wood paneling?
Clean the surface, degloss it, and apply an appropriate bonding primer. You can paint the grooves or fill them for a smoother appearance. Lighter colors, updated trim, and modern furnishings can also refresh the room.
Do wood slat panels improve room acoustics?
Some felt-backed slat systems absorb sound reflections and help manage room acoustics. Their performance depends on construction, backing material, and installation. Check published acoustic test results rather than assuming every decorative slat panel provides sound control.
Can wood panels be installed on ceilings?
Yes, suitable panel systems can be installed on ceilings when their weight and fastening requirements are properly addressed. Confirm framing support and manufacturer instructions before beginning. Electrical fixtures and other ceiling penetrations also need appropriate clearances and safe installation.
Final Thoughts
Wood paneling offers homeowners many ways to add warmth, texture, and architectural detail. The right choice depends on your preferred appearance, room conditions, material performance, and installation requirements. From classic beadboard to contemporary acoustic slats, each style can create a distinct interior. Start with one wall, choose a suitable material, and plan the layout before purchasing supplies. Pay particular attention to moisture protection, expansion clearances, electrical boxes, and fire-safety documentation. With careful preparation, your finished wall can complement the home for years. —